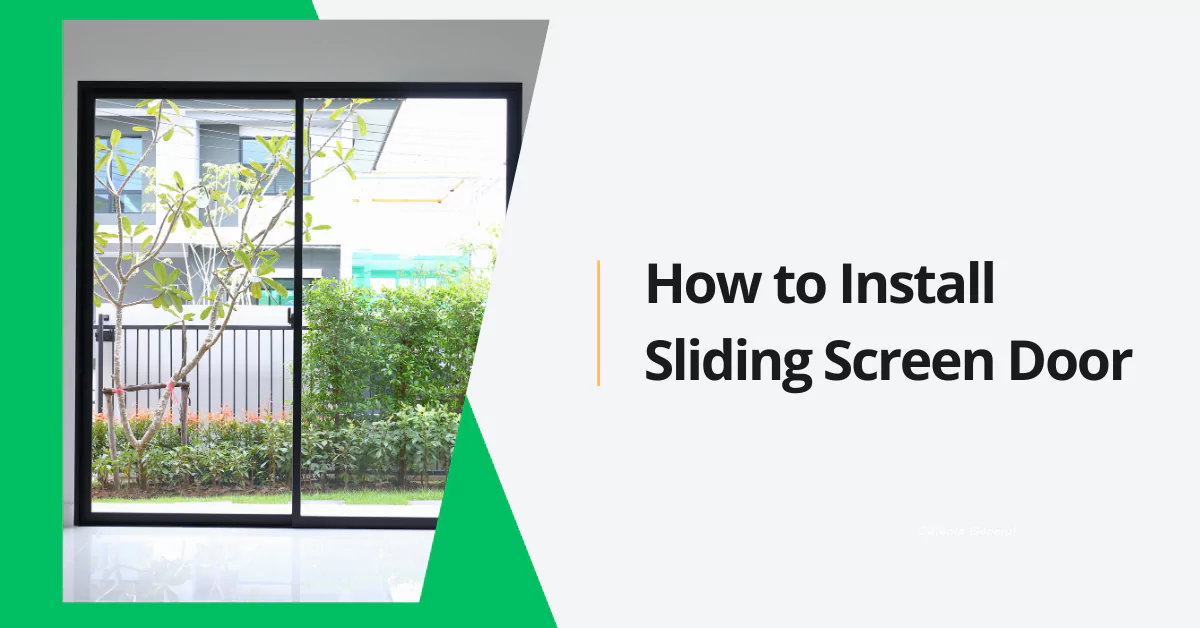
Ah, the joy of a gentle breeze wafting through your home on a beautiful day! A sliding screen door is your best friend for this, letting the fresh air in while keeping pesky insects out. Plus, it’s a great way to naturally ventilate your home and save a bit on energy by giving the AC a break. Many homes with sliding glass patio doors can benefit from a well-installed screen door. These screen doors are designed to complement various Sliding Doors types guide, enhancing their usability.
“But isn’t installing one complicated?” you might ask. Good news! For most standard doors, installing a sliding screen door is a beginner to intermediate DIY project that you can often tackle in about 30-60 minutes. It usually doesn’t require a ton of fancy tools either.
However, if your door frame is damaged, severely out of square, or if you’re just not comfortable with home improvement tasks, calling a professional is always a smart option.
This comprehensive guide will cover everything you need to know:
- Different types of sliding screen doors available.
- How to accurately measure your door opening (super important!).
- The tools and materials you’ll need.
- A detailed step-by-step installation process.
- Tips for special installation scenarios.
- Troubleshooting common problems.
- Maintenance to keep your door gliding smoothly.
So, ready to embrace the breeze? Let’s get started on your sliding screen door installation!
Sliding Screen Door Types Compared: Pick Your Protector
Not all sliding screen doors are created equal. Here are the common types you’ll find:
Sliding Screen Door Types Compared
Standard Aluminum Sliding Screen Doors
The most common type, with a roll-formed aluminum frame. Lightweight and affordable.
Pros
- Budget-friendly
- Widely available
- Easy to handle
Cons
- Less durable
- May bend or dent more easily
Heavy-Duty Extruded Aluminum Doors
Made with stronger, thicker extruded aluminum frames.
Pros
- More durable and rigid
- Resist bending/warping better
- Good for high-traffic areas
- Ideal for homes with pets/kids
Cons
- More expensive than standard aluminum
Adjustable-Fit Sliding Screen Doors
Designed with adjustable expanders to fit a range of opening sizes.
Pros
- Forgiving for non-standard openings
- Provides a quick fix solution
Cons
- May not provide as tight a fit
- Potentially less durable
Retractable Sliding Screen Doors
These screens roll up into a housing when not in use.
Pros
- Clean look when not needed
- Protects screen from wear
- Modern aesthetic
Cons
- More expensive
- More complex installation
- May require more maintenance
PVC and Vinyl Options
Frames made primarily of PVC or vinyl.
Pros
- Rust-proof (great for coastal areas)
- Low maintenance
- Can be color-matched to vinyl patio doors
Cons
- May not be as rigid as aluminum
- Quality varies between manufacturers
- Standard Aluminum Sliding Screen Doors:
- What: The most common type, with a roll-formed aluminum frame. Lightweight and affordable.
- Pros: Budget-friendly, widely available, easy to handle.
- Cons: Can be less durable, may bend or dent more easily than heavy-duty options.
- Heavy-Duty Extruded Aluminum Doors:
- What: Made with stronger, thicker extruded aluminum frames.
- Pros: Much more durable and rigid, resist bending/warping better, good for high-traffic areas or homes with pets/kids.
- Cons: More expensive than standard aluminum.
- Adjustable-Fit Sliding Screen Doors:
- What: Designed with adjustable expanders, usually at the top and bottom or sides, to fit a range of opening heights or widths.
- Pros: Forgiving for slightly non-standard openings, can be a quick fix.
- Cons: Might not provide as tight or custom a fit as a precisely sized door, potentially less durable depending on adjustment mechanism.
- Retractable Sliding Screen Doors:
- What: These screens roll up or retract into a housing on the side of the door frame when not in use, becoming nearly invisible.
- Pros: Clean look when not needed, protects screen from wear and tear when retracted, modern aesthetic.
- Cons: More expensive, installation can be more complex, moving parts may require more maintenance.
- PVC and Vinyl Options:
- What: Frames made primarily of PVC or vinyl.
- Pros: Rust-proof (great for coastal areas), low maintenance, can be color-matched to vinyl patio doors. The choice between Vinyl vs. Aluminum Sliding Doors for your main patio door might influence your screen door material choice for a cohesive look.
- Cons: May not be as rigid as aluminum, especially in larger sizes; quality varies.
Comparison Table: Sliding Screen Door Types
| Type | Pros | Cons | Best For |
|---|---|---|---|
| Standard Aluminum | Affordable, lightweight, common | Less durable, can bend easily | Budget projects, low-traffic areas |
| Heavy-Duty Extruded Alu. | Very durable, rigid, long-lasting | More expensive | High-traffic, pets/kids, longevity focus |
| Adjustable-Fit | Fits various sizes, good for non-standard | May not be as snug/durable, less custom look | Quick fixes, slightly off-size openings |
| Retractable | Disappears when not in use, clean look | Expensive, more complex install/maintenance | Modern aesthetics, unobstructed views when open |
| PVC/Vinyl | Rust-proof, low maintenance, good for coastal | Can be less rigid, quality varies | Coastal areas, matching vinyl patio doors |
Pre-Installation Preparation: Measure Twice, Install Once!
This stage is CRUCIAL. An accurately measured door will install smoothly; an incorrectly measured one will be a headache!
Sliding Screen Door Measurement Guide
Height Measurement
- Measure from top track to bottom track
- Take three measurements: Left, Center, Right
- Use the shortest measurement
Width Measurement
- Measure from side jamb to side jamb
- Take three measurements: Top, Middle, Bottom
- Use the narrowest measurement
Track Dimensions
- Measure track width (side to side)
- Measure track depth (top to bottom)
- Note dimensions for proper roller fit
A. Measuring Your Door Opening: The Most Important Step!
You'll need to measure the opening where your existing sliding glass door is. The screen door typically fits into channels or tracks on the outside of your main sliding door frame. For a deep dive into all the nuances of sizing, check our specific Sliding Screen Door Sizes guide.

- Height Measurement:
- Measure from the deepest part of the top track down to the deepest part of the bottom track (or to the top of the bottom track rail if it's raised).
- Take this measurement in three places: Left side, Center, and Right side.
- Use the shortest of these three height measurements. This ensures the door won't be too tall to fit.
- Width Measurement:
- Measure from the side jamb where the screen door will close against, across to the other side jamb where the screen door will meet the edge of your sliding glass door when closed.
- Take this measurement in three places: Top, Middle, and Bottom.
- Use the narrowest of these three width measurements.
- Accounting for Uneven Openings: If your height or width measurements vary by more than 1/4 inch, your opening might be out of square. An adjustable door might be an option, or you may need to make slight adjustments during installation.
- Track Depth & Width: Also note the depth and width of the tracks themselves, as some screen door rollers are designed for specific track types.
B. Essential Tools and Materials: Gather Your Gear!
Most sliding screen door installations don't require a massive toolbox.
- Required Tools:
- Phillips Head Screwdriver: For adjusting roller screws and installing latch hardware.
- Putty Knife or Flat-Head Screwdriver: Very useful for helping guide rollers onto the track and for prying out old weather stripping.
- Measuring Tape: For your initial measurements and verifying door size.
- (Image: Phillips screwdriver, putty knife, tape measure labeled)
- Optional (But Helpful) Tools:
- Drill with Phillips Bit: Speeds up screw installation/adjustment.
- Level: Can help check if your main door frame is reasonably level, though the screen usually follows existing tracks.
- Safety Glasses & Gloves: Always a good idea when working on home projects!
- Materials (Usually come with the new screen door kit):
- Sliding screen door unit
- Handle and latch mechanism with screws
- Bug sweep or weather stripping for the edges
- Instruction manual (read it!)
C. Purchasing the Right Door: Making the Selection
- Use Your Measurements: This is key! Purchase a screen door that matches the shortest height and narrowest width you recorded. Most screen doors have a small amount of height adjustment built into the rollers/expanders (typically 1/4" to 1/2").
- Material: Consider your climate. Aluminum is common. Vinyl/PVC is great for coastal areas (no rust). Heavy-duty aluminum offers better durability.
- Budget: Standard aluminum doors are most affordable ($50-$150). Heavy-duty or retractable screens cost more ($150-$500+).
- Where to Purchase: Home improvement stores (Home Depot, Lowe's), local hardware stores, window and door specialty shops, or online retailers.
Step-by-Step Installation Guide: Let's Get Rolling!
Alright, you've got your door and your tools. Time to install! Always refer to the specific instruction manual that came with your screen door, as details can vary slightly between brands and models.
Step 1: Unpacking and Organizing Components
- Carefully unpack your new screen door. Lay out all the parts (door, handle kit, screws, weather stripping).
- Check the parts list in the manual to ensure everything is there.
- Inspect for any damage that might have occurred during shipping.
Step 2: Preparing the Door Frame (Your Main Patio Door Frame)
- Clean the Tracks: Thoroughly clean the top and bottom tracks in your patio door frame where the screen door will ride. Use a vacuum cleaner with a crevice tool, then wipe with a damp cloth. Old dirt and debris are a common reason Why is My Sliding Door So Hard to Open, and this applies to screen doors too!
- Inspect Tracks: Look for any dents, bends, or obstructions in the tracks. Minor dents can sometimes be gently straightened with pliers or a block of wood and a hammer. If tracks are severely damaged, they might need repair/replacement before the screen door will operate smoothly.
- Existing Hardware: If you're replacing an old screen door, remove it first (see Section V).
Step 3: Preparing the Screen Door Itself
- Orientation: Determine the correct way the door should face (handle usually goes on the inside, latch faces the jamb it will connect to).
- Loosen Expander Screws (If Applicable): Many screen doors have expander sections at the top and/or bottom edges, controlled by screws on the side edges of the door. These allow for slight height adjustment. Loosen these screws slightly so the expanders are not fully extended. This makes it easier to get the door into the tracks.
- Roller Adjustment: Most screen doors have adjustable rollers (wheels) at the top and bottom. The screws for these are usually on the side edges of the door, near the corners. Initially, adjust the rollers so they are mostly retracted into the door frame (i.e., the door is at its "shortest" setting). This gives you maximum clearance for installation.
Step 4: Installing the Door – Top Track First (The Key Technique!)
This is often the trickiest part for beginners.
- Position: Stand outside, facing your patio door.
- Angle: Hold the screen door upright. Tilt the top edge of the screen door up into the top track of your patio door frame. Make sure the top rollers (or the top edge of the door if it's a simple design) are fully engaged within the deepest part of the top channel.
- Guide: If your top track is very deep or has a lip, you might need to use a thin plastic guide (sometimes included) or the tip of your putty knife to help maneuver the top edge of the door past any obstructions and fully into the channel.
Step 5: Setting the Door into the Bottom Track
Once the top is securely in the top track:
- Lift & Push: While keeping the top edge engaged, lift the entire screen door up as far as it will go into the top track.
- Swing In: While lifted, push the bottom edge of the screen door inward towards the house, aiming to place the bottom rollers onto the bottom track rail.
- Use Putty Knife (If Needed): You may need to gently use your putty knife to help guide the bottom rollers over the lip of the bottom track and onto the rail.
- Lower: Gently lower the door so the bottom rollers rest on the bottom track. The door should now be sitting in both top and bottom tracks.
(A short video embedded here showing this top-in-first, then lift-and-swing-bottom-in technique would be super helpful for users!)
Step 6: Adjusting for Smooth Operation – Getting the Glide Right!
Now, make it slide like a dream!
- Adjust Bottom Rollers: Using your Phillips screwdriver, find the adjustment screws for the bottom rollers (usually on the side edges, near the bottom corners).
- Turn the screws to raise or lower each bottom corner of the door. Your goal is to have the door hang straight, with a small, even clearance above the bottom track (not dragging), and to be high enough so it doesn't pop out easily.
- Adjust Top Expander Screws (If Equipped): Once the bottom rollers are set for smooth sliding, tighten the expander screws on the sides of the door. This will push the top (and sometimes bottom) expander edge of the screen door frame firmly up into the top track, providing a snugger fit and preventing wobbling or derailing. Don't overtighten, just make it snug.
- Test: Slide the door back and forth. It should glide smoothly without excessive force or scraping. It should feel stable in the tracks. Make small roller/expander adjustments as needed.
Step 7: Installing Weather Stripping and Bug Sweep
- Many screen doors come with a fuzzy weather stripping (often called a "bug sweep" or "bug strip") that attaches to the side edge of the screen door (the one that meets the side jamb of your patio door frame when closed).
- Cut it to length if necessary. It usually slides into a channel on the door edge or has an adhesive backing.
- Press it firmly into place. This strip helps seal the gap and keep tiny insects out.
- Proper sealing is important for overall comfort. For your main door, you might also want to consider How to Insulate Sliding Glass Doors for Summer or for winter to maximize energy efficiency.
Step 8: Installing the Latch Mechanism
- Position Latch: Close the screen door. Hold the handle/latch assembly against the inside of the screen door frame where you want it. It should align with where the strike plate (or J-hook/keeper) will go on the patio door side jamb.
- Mark Screw Holes: Mark the screw hole locations for the handle/latch.
- Install Latch: Pre-drill small pilot holes if needed (especially for aluminum frames). Screw the handle/latch assembly onto the screen door.
- Position Strike Plate/Keeper: Hold the strike plate (the piece the latch connects to) against the side jamb of your main patio door frame. Align it so the screen door latch will engage it smoothly and securely when the door is closed.
- Install Strike Plate: Mark its screw holes. Pre-drill and screw it into place.
- Test Latch: Open and close the screen door, testing the latch. It should click securely. Adjust the position of the strike plate slightly if needed for perfect engagement.
Step 9: Final Adjustments and Testing
- Slide the door back and forth multiple times. Is it smooth? Stable?
- Check the latch again. Does it catch easily and hold securely?
- Look for any gaps around the edges. Does the bug sweep make good contact?
- Give it a gentle wiggle. Does it feel secure in the tracks?
Congrats! Your basic installation should be complete! 🎉
Special Installation Scenarios: Unique Situations
- Non-Standard Openings: If your opening is slightly too wide or tall for standard doors, an adjustable-fit screen door might be your best bet. For significantly oversized openings, you might need a custom-made screen door. If you need a custom main door, you can order sliding glass door from us with specific dimensions.
- Replacing an Existing Screen Door: This is often easier as the tracks are already there.
- Removing Old Door: Usually, you just reverse the installation: loosen expanders, retract rollers, lift bottom out, then lower top out. Our guide on How to Remove a Sliding glass Door has general principles for main doors that can be adapted for screen doors.
- Hardware: You can often reuse existing latch hardware if it's in good shape and compatible with the new door, but new doors usually come with their own.
- Accessibility: For easier operation, choose a door with a larger, easier-to-grip handle. Ensure rollers are well-adjusted for minimal sliding effort.
Self-reflection: Thinking about major door changes? If your whole patio door setup is old and you're considering a significant upgrade, remember there are other options beyond sliders. For example, some homeowners choose to How to Replace Sliding Glass Doors with French Doors for a different aesthetic and operational style.
Troubleshooting Common Installation Problems
Even with care, sometimes things don't go perfectly.
- Door Won't Slide Smoothly:
- Cause: Debris in track, rollers too tight/loose, rollers damaged, track bent.
- Solution: Clean track thoroughly. Adjust bottom roller height (see Step 6). Check rollers for damage and replace if needed. Gently try to straighten minor track bends. A tiny bit of silicone lubricant in the track can help but use sparingly as it can attract dirt.
- Door Won't Stay on Track:
- Cause: Rollers not adjusted high enough (door too loose in frame), top/bottom expanders not tightened enough, track damaged, door too small for opening.
- Solution: Readjust bottom rollers higher. Tighten expander screws. Inspect track for damage. Double-check your initial measurements if the door seems too small.
- Door Won't Latch Properly:
- Cause: Strike plate misaligned, latch mechanism faulty, door not closing fully due to alignment.
- Solution: Loosen and reposition strike plate. Check latch parts for damage. Ensure door is properly aligned and not binding.
- Gaps Around Door Edges:
- Cause: Bug sweep not installed or damaged, door expanders not adjusted correctly, door warped (less common for new doors).
- Solution: Install or replace bug sweep. Adjust expander screws for a snugger fit. If door itself is warped, contact manufacturer.
Maintenance and Care: Keep it Gliding Like New
A little care goes a long way!
- Seasonal Schedule:
- Spring: Clean tracks and screen mesh thoroughly. Check rollers and latch.
- Summer: Ensure smooth operation for frequent use.
- Fall: Clean out any leaves/debris from tracks before wetter weather.
- Winter: In very harsh climates, some people remove and store their screen doors to protect them, though most modern ones can stay up year-round.
- Cleaning:
- Frame: Mild soap and water.
- Screen Mesh: Gently vacuum with brush attachment, or wash with mild soap/water and a soft brush. Rinse well. Avoid pressure washers.
- Tracks: Vacuum regularly. Wipe with damp cloth.
- Common Repairs:
- Screen Replacement: Torn screen? Rescreening kits are available at hardware stores. Relatively easy DIY.
- Roller Replacement: Worn or broken rollers can usually be unscrewed and replaced with new ones (take old one to store to match size/style).
- Weather Stripping/Bug Sweep Renewal: Easy to replace when worn.
DIY vs. Professional Installation: Making the Call
- Cost: DIY saves $100-$300+ on labor. Professional installation adds this cost but includes expertise. Our general standard door cost guide can give you an idea of how installation factors into overall door pricing.
- Time: DIY: 30-60 minutes (or more if issues arise). Pro: Usually under an hour.
- Skills: DIY needs basic tool use, careful measuring, patience.
- Call a Pro If: Your door opening is significantly out of square, tracks are badly damaged, you're very uncomfortable with DIY, or you're installing a complex retractable system.
Frequently Asked Questions
How tight should a sliding screen door be?
Can I get a sliding screen door for any sliding glass door?
My screen door is a weird size. What are my options?
What's the best way to keep the bottom track clean?
Are sliding screen doors secure?
Do retractable screen doors last as long as regular ones?
What if my main sliding door has a handle that sticks out far?
Conclusion: Enjoy the Breeze!
Installing a sliding screen door is a very doable DIY project that adds a lot of comfort and enjoyment to your home. By carefully measuring, choosing the right type of door for your needs, and following the installation steps methodically, you can have a smoothly gliding screen door ready in about an hour.
Remember the key steps: clean tracks, top in first, lift and set the bottom, adjust rollers and expanders for a snug but smooth fit, and install your latch and bug sweep. And don't forget a little regular maintenance to keep it in top shape!
If you run into major issues with your main sliding glass door itself, or if you're considering a complete patio door upgrade, we can help! Whether you need a standard size or something unique, you can order sliding glass door from us to fit your exact needs. And if you're weighing all your patio door options, consider the pros and cons of French Doors vs Sliding Doors for your home.
Now, go enjoy that fresh, bug-free air! You've earned it!